Note: in order to run HD Wave you must have a Windows administrator account type on the PC. You can change the Windows account type from Control Panel – User Account.
When you launch the HD Wave application you will be asked to login (using your account credentials):
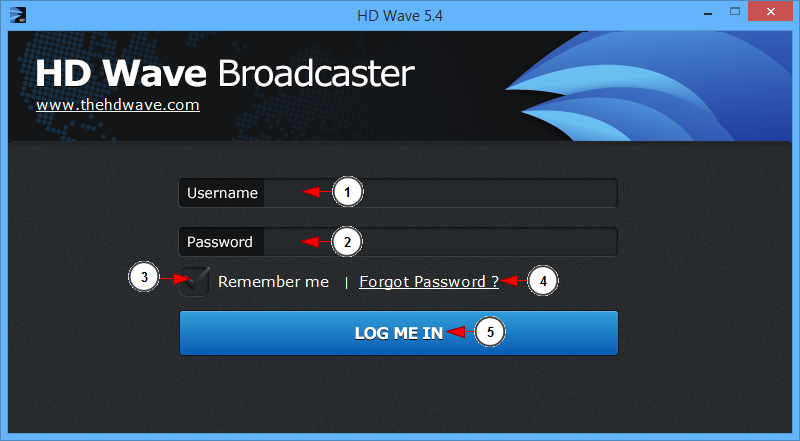
1. Enter here your registered username address (e.g broadcaster@NKTelko.com).
2. Enter here your account password.
Note: In order to use The HD Wave your account password cannot contain non-alphanumeric symbols, such as: ! , @ , # , $ , % , ^ , & , * , ( , ).
3. Check this box if you want the application to remember your username and password.
4. If you have forgotten your password, click this link to have re-send your credentials to your registered email address.
5. Click to log into the application.
Note: in case the log in fields are not properly displayed and you are having trouble inserting your credentials, then you may need to adjust the display settings from your PC.
Once you’re logged in the application you can adjust the settings:
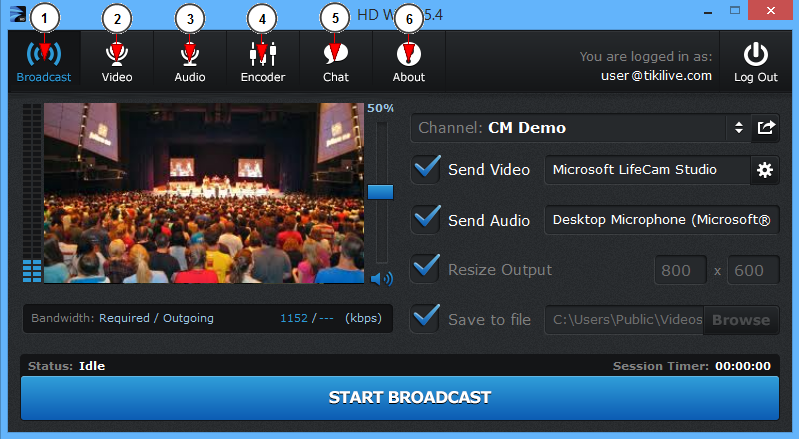
1. Click here to adjust the broadcasting settings.
2. Click here to adjust the video settings.
3. Click here to adjust the audio settings.
4. Click here to adjust the encoding settings.
5. Click here to adjust the chat settings.
6. Click here to view details about the broadcaster version.
1. Run HD Wave
The application will open as you can see in the following picture, where we will explain each detail.
Note: in order to enable your video source, it’s mandatory to check the send video box (no. 6 in picture below).

1. Here you can see the video feed.
2. Here you can see the volume graph bar.
3. Here is the volume bar. Drag the button to adjust the volume. The volume percentage is displayed on top of the volume bar. Click on the volume icon if you want to mute the volume.
4. Click here to select the channel you want to broadcast on.
5. Click here to view the Channel page. It will open in a tab window in your default browser.
6. Check the box to enable the video streaming.
7. Click here to adjust the webcam settings.
8. Check the box to enable the audio streaming.
9. Check this box to re-size the video output. Insert the desired values in the boxes.
10. Check this box if you want to save the video broadcast in your computer. You can select the location of the saved file clicking the browse button.
11. Here you can view the Required bandwidth for the streaming resolution you set.
12. Here you can view the bandwidth that will be used for this steam session
13. Here you can view the status of the video streaming.
14. Here you can view the session timer.
15. Click here to start/stop the broadcast.
2. Video settings
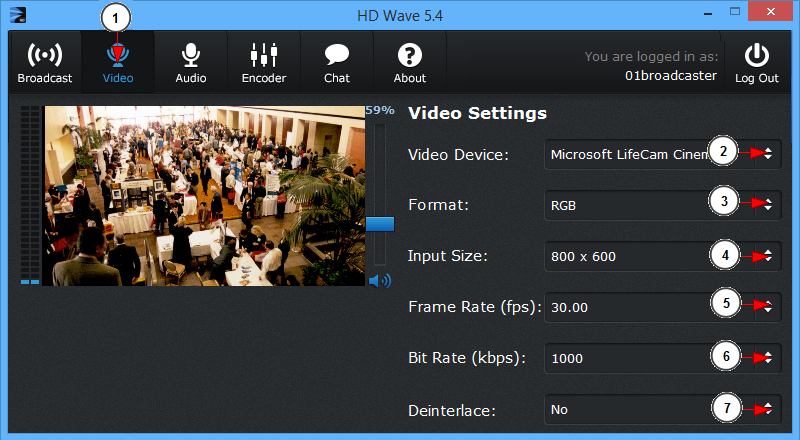
1. Click here to view and edit the video settings.
2. Click here to select one of the existing video sources connected to your computer.
3. You can select from the drop down list the format of the video your webcam supports.
4. Click on the drop-down to select the input video sizes for the selected camera.
5. Click here to select the frame rate.
6. Click here to select the bit rate – the higher the bit rate is – the better the video quality is. You need a strong internet connection if you want a high bit rate.
7. Check the radio button if you want to enable or disable the deinterlace button. The default value for a clear video streaming is NO.
Note: if your video input is not very clear the deinterlace button can be set to YES.
3. Audio settings
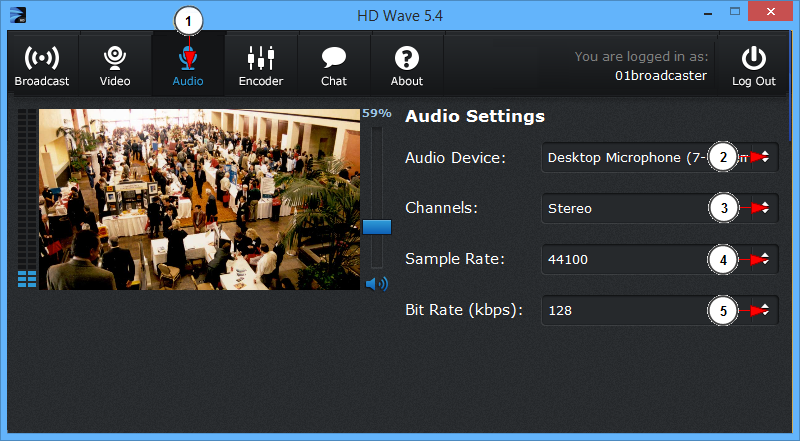
1. Click here to view and adjust the audio settings.
2. Click on the drop down list to choose the desired audio device.
3. Choose a mono or a stereo channel.
4. Click here to select the sample rate – how many audio signals you receive per second. The most common sample rate is 48000 – 48 kHz.
5. Click here to select the bit rate – the higher the bit rate is the better sound quality you have.
4. Advanced encoder settings
Here is how the advanced encoder settings window looks like:
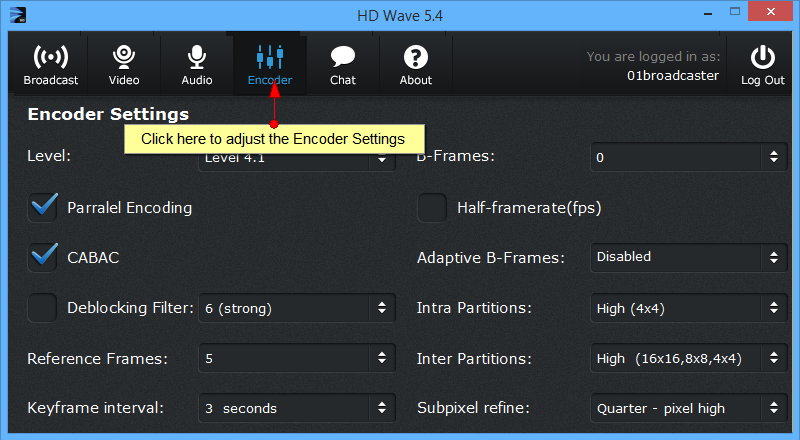
Before starting to edit the advanced encoding settings, check the Video encoding properties page for more information.
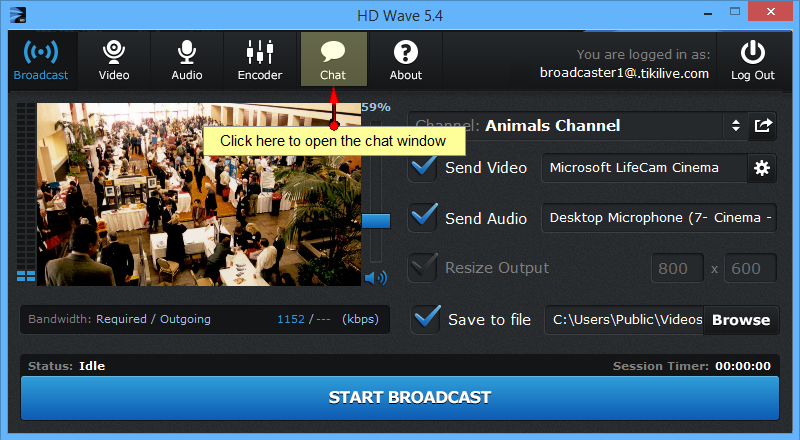
5. Chat
If you click on the Chat button, the chat window will open and you can start a conversation with your viewers while live streaming:
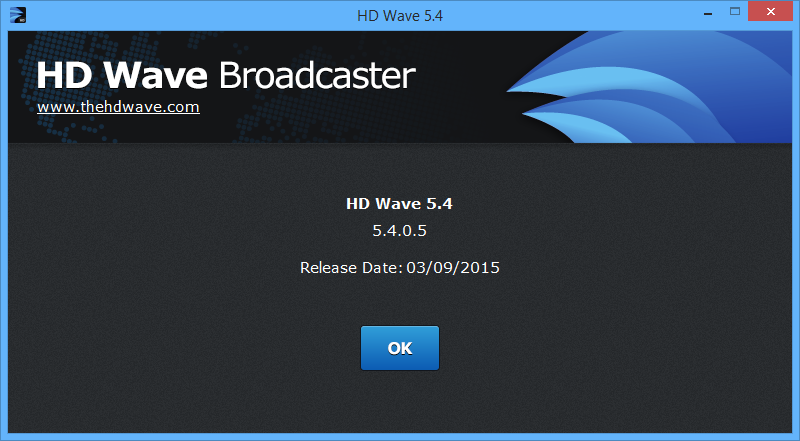
6. About
If you click on the About button you can see the details of the HD Wave broadcaster version: